Showing posts with label dessert. Show all posts

Monday, September 3, 2012

Salted Caramel Sauce

This is what healthy frozen dessert dreams are made of.... YUM! It just happens to be raw as well as delicious too.
 
 
Ingredients:
  • 1 cup Medjool dates
  • 3/4 cup water (or 1 cup if you are leaving out the liquid sweetener)
  • 1 1/2 tablespoons agave nectar or maple syrup (if you are on a strict raw diet it's probably a good idea you leave this out)
  • 1/4 teaspoon fresh scraped vanilla beans or gluten free vanilla extract
  • pinch of salt
 
Directions:
  1. Put all ingredients in a food processor and whizz up until smooth. Its that simple!
I served mine over vegan vanilla ice cream with bashed up almonds and dairy free chocolate sprinkled over the top. I can recommend it, it was delicious! Who would have thought caramel could be so healthy? :)


Why not serve it with my Native Foods Cafe inspired Boogie Bars and dairy free vanilla ice cream? Banana, Caramel, Chocolate Chips, Vanilla, Oats, Almond, Coconut.... what a combination!

Wednesday, August 29, 2012

Chocolate Shake

Smooth, thick & 'ice'creamy, chocolately, and oh so yummy! oh and can't forget... HEALTHY!


Ingredients:
(makes 1)
  • 1 frozen banana
  • 1 cup unsweetened vanilla almond/soy milk
  • 1 tablespoon raw cocoa powder or carob (more if you like it extra chocolately!)
  • 1/2 tablespoon raw peanut butter 
  • 1 teaspoon gluten free vanilla extract
  • Sprinkling of carob or vegan choc flakes (optional)
Directions:
  1. Place the frozen banana in a food processor, and pulse until it resembles frozen soft serve ice cream. (don't whizz it up so much it melts).
  2. Add all the other ingredients, and whizz until fully combined. It's that simple! If you want it even thicker add an extra half tablespoon peanut butter).
  3. Pour into a chilled glass, pop in a straw (or a spoon might be more appropriate really), sprinkle on a few carob or vegan chocolate flakes and serve. :)
To make it a thick and 'ice'creamy vanilla shake, leave out the cocoa powder and add an extra half teaspoon of vanilla extract. If you need to make it a tiny bit sweeter... a teaspoon agave nectar or sweetened vanilla almond/soy milk will do the trick!

I got super excited today, as the rock star of an actress, Dawn Olivieri, asked me on twitter if I knew how to make a vegan malt shake. I love that people are getting as excited as me over these recipes. So here goes... If you want a malted milk shake, use this recipe, omitting the peanut butter and using 1 1/2 tablespoons barley malt syrup or powder extract instead. This does contain gluten though... so it's not suitable for celiacs, or for people with a gluten allergy.... sorry! But celiacs can still enjoy shake without the malt.... it still tastes reallly really good! :)
Gym bunnies could also add a scoop of vegan/ gluten free protein powder for a yummy pre- or post- workout snack!

Monday, August 27, 2012

Banana Cream Pie

Craving pie? Well look no further! This Banana Cream yumminess is for you. It's actually good for you as well, so you can indulge with non of the naughty-ness. It's so healthy, you could even have it for breakfast! Raw, and packed full of fruit & nuts... your skin will glow, your step will be springy, & your smile will be beaming! :)


Ingredients:-
For the pie crust:
  • 1 1/2cups medjool dates
  • 1 cup almonds (walnuts or pecans work too)
  • 1/2 teaspoon maple syrup
  • 1/2 teaspoon freshly scraped vanilla pod
For the cream filling:
  • 1 1/2 cups cashews (soaked in water for 4 hours)
  • 1/4 cup water
  • 2 teaspoons vanilla
  • 2 small ripe bananas
  • 2 tablespoons shredded unsweetened coconut
  • 3 tablespoons maple syrup
For the topping:
  • 2 bananas
Directions:
  1. Place the dates and almonds in a food processor, and pulse until fine.
  2. Add the vanilla and maple syrup and pulse again until mixed in.
  3. Press the almond mix into a pie pan, forming  a crust. Place into the refrigerator while you make the filling.
  4. Drain the cashews, place them in a food processor with the water, and blend together until smooth, scraping down the sides as needed (it should take about 3 mins).
  5. Add the vanilla, coconut and maple syrup, blend until combined.
  6. Slice the banana, add that to the food processor and blend again until fully combined, it should be creamy and very smooth.
  7. Spoon the filling into the pie crust, and spread evenly. Place in the refrigerator or freezer to set.
  8. Slice the bananas for the topping just before you're ready to serve it, (otherwise they will start to go brown) and place them evenly over the set cream filling. It's also better to portion the pie while it's still a bit chilled, as it keeps it's shape a lot better.
  9. Serve and Enjoy!  :)
Wanting to make it even more decadent and luxurious? Why not add 2 tablespoons of cocoa powder to the cream filling or sprinkle with coconut shavings to serve?! Utterly yummy and oh so good for you too.

Thursday, August 23, 2012

Sweet Apple Kugel & '2 Broke Girls'

A good giggle is super good for you and I love the TV show '2 Broke Girls', (thank you CBS, you rock!) and even though I doubt Max and Caroline's cupcakes are vegan and gluten free... I still think they look delicious! (I just wouldn't be able to sample them).
 
 
But it wasn't their cupcakes and frosting that caught my attention one Monday night. It was the Kugel they were fed! It was the episode entitled...'And the Kosher Cupcakes', and Max was going nuts for the stuff! I have to admit I had never heard of it before this episode, well I'd heard of it, I just didn't know 100% what it was, and I have to say, it had me intrigued!
 
 
The Kugel didn't sound very vegan or gluten free, so, I got to work! After a few tries, some culinary magic happened. Cue my Sweet Apple Kugel.... (P.S. Thank you CBS for the '2 Broke Girls' pics)
 

Ingredients
  • 12oz vegan gluten free pasta (check the label for egg!) I used noodles but any pasta would work. Why not try kugel lasagna?
  • 1/2 cup agave nectar
  • 15oz silken tofu
  • 1 tablespoon unsweetened vanilla soy milk
  • 2 cups raisins
  • 4 medium apples (my favourites are pink ladies)
  • 1/4 cup applesauce
  • 2 teaspoons gluten free vanilla extract
  • 1 teaspoon cinnamon (and extra to dust if you fancy)
  • 3 tablespoons vegan dark chocolate chips (optional)

Directions
  1. Pre heat the oven to 400 degrees.
  2. Cook the pasta according to packet instructions and drain.
  3. While the pasta is cooking peel and cut the apples into small cubes or slices.
  4. In a food processor, blend together the silken tofu, soy milk, applesauce, vanilla extract, and cinnamon.
  5. Toss the pasta with the apple and raisins until evenly distributed. Place half of the noodle mix into a casserole dish or tray.
  6. If your using choc chips, sprinkle them over the noodles, and then cover with the other half of the pasta mix. I sandwich the chocolate chips in the middle, because I think they make an oh-so-satisfying gooey melty surprise, plus it stops them burning if some end up near the top. But,  you could always toss them with the pasta, raisins, and apple if you want them distributed through  the dessert.
  7. Pour the tofu batter evenly over the noodles making sure they are fully coated, and dust with extra cinnamon if you fancy.
  8. Bake for 35-45 mins until golden and (I can't think of a better way to describe this, so I apologise in advance) 'not sloppy'.
  9. Let cool slightly, and serve warm! YUM!
As I can't sample the regular Kugel to taste the difference, I took some to work with me for my Jewish colleague to taste test, and he said, "although it's not quite as good as [his] Bubby's [Grams], it is a close second". He said it didn't taste vegan or gluten free either. So, for a first attempt, I'd definitely call my Sweet Apple Kugel a success! It was so good, I snook some leftovers for breakfast the day after. I know what your thinking, noodles and choc for breakfast?!?! But please don't judge.. I was in a rush. And, there is some fruit in there too! :) xo

Wednesday, August 22, 2012

Chocolate Chip Pretzel Bit Oatmeal Peanut Butter Cookies

I know what your thinking... these little yummies can't possibly be vegan and gluten free, they sound too delicious!? Because even I think that, and I've baked them, (and sampled them). But they are... they really really are! (They are just as delicious as they sound too).


Ingredients
  • 2 1/2 cups gluten free oats
  • 1/4 cup gluten free flour
  • 3/4 cup (smooth) peanut butter
  • 2 tablespoons peanuts
  • 1 ripe banana
  • 1 teaspoon gluten free vanilla extract
  • 2 tablespoons maple syrup
  • 2 tablspoons unsweetened vanilla soy milk
  • 1/2 cup vegan dark chocolate chips
  • 1/4 cup vegan gluten free mini pretzels

Directions
  1. Pre heat the oven to 350 degrees.
  2. Pulse the peanuts in a food processor until they are small pieces, or put them im a zip lock and bash, and set aside.
  3. Place the pretzels in a ziplock, bash into small pieces, and set aside.
  4. Puree or mash the banana and place in a large bowl.
  5. Add the peanut butter, soy milk, vanilla, and maple syrup to the banana and mix well.
  6. Add the oats, and flour and stir through, until fully combined.
  7. Add the choc chips, pretzel bits and peanuts and stir through the cookie mix.
  8. Drop spoonfuls of dough onto an ungreased cookie sheet (I used an ice cream scoop), and bake for 12-15 mins or until golden.
  9. These taste best if you let them cool slightly and serve warm, maybe even with ice cream for an extra treat, but they will stay fresh for a few days in a cookie jar!

Thursday, August 2, 2012

Fudgsicles

One of the best things about summer? Why, popsicles of course! And just because you're vegan and gluten free doesn't mean you can't indulge. Even if you aren't, you will still love these fudgsicles, they are super easy to make, and they are heaps healthier for you too! Bonus!


Ingredients
  • 5 bananas
  • 3 tablespoons cocoa powder
  • 2 tablespoons peanut butter
  • 1 teaspoon gluten free vanilla extract
  • 1 tablespoon unsweetened vanilla soy milk

Directions
  1. Peel and slice the bananas and freeze them in a ziplock bag for about an hour.
  2. Place all the ingredients in a food processor, and blend until they are all combined, and a suitable texture to put in your popsicle mould. It should be soft but not too runny.
  3. Spoon your chocolate banana mixture into the popsicle moulds, and freeze until set (mine took about 3 hours).
  4. Enjoy... YUM! :)


Sunday, July 1, 2012

Ice Cream Sandwich Cookies

Happy 4th July weekend conscious foodies! My roommate's family have invited us to a sort of 'potluck' cookout (complete with fireworks...of course!) to celebrate, and as gluten free, vegan options are often quite limited, I'm making these little bites of yumminess to take with us for dessert. If you're looking for yummy gluten free, vegan recipe ideas for 4th July, these Ice Cream Sandwich Cookies are most definitely for you.


Ingredients
For the cookies:
  • 1/2 cup unsweetened applesauce
  • 1 1/2 teaspoons chia seed meal
  • 1 tablespoon cocoa powder
  • 1 teaspoon gluten free baking powder
  • 1 1/2 cups teff flour (this is actually gluten free, I discovered it a few months ago at the market, I used brown as I thought it gave the cookies a nicer color)
  • 2/3 cup gluten free brown rice syrup
  • 1 teaspoon gluten free vanilla extract
  • 1 cup almond butter (I think the smooth kind works best in this recipe)
For the ice-cream:
  • 3 large bananas (peeled, sliced & frozen)
  • 3 tablespoons soy milk (unsweetened vanilla would taste really good, but normal works)
  • 2 teaspoons gluten free vanilla extract

To make the ice cream filling chocolate flavor, add 2 tablespoons cocoa powder. Or, if you have an ice cream maker, you could make my coconut milk ice-cream.

Directions
  1. Preheat the oven to 350 degrees, and line a really large (or 2 small) cookie sheet with baking parchment paper.
  2. Stir the chia seed meal into the applesauce & set aside.
  3. Sift together the cocoa powder, four, & baking powder.
  4. In a small sauce-pan over a very low heat, gently warm the almond butter, as it softens add the syrup & vanilla extract. Take the pan off the heat & stir through.
  5. Add the almond butter mixture to the dry ingredients and mix together until fully combined.
  6. Roll out your cookie dough to the desired thickness, (I like mine quite thin.. a bit less than 1cm thick. You may have to adjust the cooking time) and cut into rectangles.
  7. Arrange the dough on the cookie sheets, leaving a couple of inches between each one.
  8. Bake in the oven for 7-10mins. Do not overbake, they should still be quite soft.
  9. Let them cool, and harden slightly. If you're not assembling the sandwiches straight away you can freeze them in an air tight container or ziplock baggie, until you're ready.
  10. Take the bananas out of the freezer and place in a blender or vitamix. Pulse a few times adding in the soy milk and vanilla extract as you do.
  11. You can then either, if you like you're ice cream a more 'soft-servey' texture, make the sandwich cookies straight away, or you could re-freeze the ice-cream for a little while to let it firm up, like I did. I did however, sneak one 'soft-serve' style, because they looked too darn delicious!
  12. I then, used a cookie cutter to get the ice cream in the same rectangle shape as the cookies, assembled it between two of them, and then used a spoon, to the neaten up the sides. Repeat with all the cookies.
  13. Serve, and enjoy! YUM-my! :)

Wednesday, June 27, 2012

Rice Crispy Treats

These were always one of my favourites as a child, I used to love getting all messy making them, and sneaking tastes from the bowl when the adults weren't watching! Actually, even at 24, they are still one of my favourites, but now, I just don't have an adult frowning at me for pinching the gooey yumminess... I'm allowed to sneak tastes freely! I haven't had them for a while, I just didn't think they would be something I would be able to eat being a gluten free vegan. But, stumbling upon the gluten free rice cereal at the market got me thinking how much I missed them,  and after quite a few batches, I think I've come up with a recipe that is so yummy, you actually can't tell the difference!


Ingredients
  • 8 cups gluten free rice cereal
  • 1 cup almond butter
  • 1 cup brown rice syrup
  • 1/2 cup gluten free vegan marshmallows
  • 1 tablespoon gluten free vanilla extract

Directions
  1. Line a square/rectangle cake pan with baking parchment paper.
  2. Pour the rice cereal in a really large bowl, (you need enough mixing room not to spill any).
  3. Over a low-medium heat, in a large saucepan, combine the almond butter & brown rice syrup, stirring constantly until melted.
  4. Turn the heat down slightly, add the marshmallows, & keep stirring until melted.
  5. Take the pan off the heat, stir in the vanilla extract.
  6. Pour the melted marshmallow 'sauce' over the cereal & keep stirring until all the rice is coated.
  7. Spoon into your lined cake pan, press the mixture down, & refridgerate for about 1 hour.
  8. Cut into squares, and serve. Enjoy :)

Wednesday, June 13, 2012

Fudgey Chocolate Chocolate Banana Brownies

Because every now and then a girl just needs some chocolate, and what better way is there to indulge your sweet tooth than doing it healthily. So yummy, decadent & so chocolately it needed to be said twice :)


Ingredients
  • 1 cup banana
  • 2/3 cup unsweetened apple sauce
  • 2/3 cup medjool dates
  • 2 tablespoons almond butter
  • 1 cup agave nectar
  • 1/2 cup brown rice flour
  • 1/2 cup almond meal/flour
  • 2 teaspoons gluten free vanilla extract
  • 1/2 cup raw cocoa powder
  • 1 teaspoon xanthan gum
  • 1 teaspoon gluten free baking soda
  • 1/4 teaspoon sea salt
  • 3/4 cup vegan chocolate chips
  • 3/4 cup vegan chocolate chips

Directions
  1. Preheat the oven to 350 degrees, lightly grease a square or rectangular baking pan. I used Earth Balance Spread.
  2. Mash the banana, set aside. Pulse the dates in a food processor a couple of times (or chop very finely), and set aside.
  3. Sift the flour, almond meal, cocoa powder, baking soda, xanthan gum & salt together in a large mixing bowl.
  4. Melt 1 of the 3/4 cups vegan chocolate chips in a heatproof bowl over a pan of boiling water. Add the agave nectar & vanilla extract, stir until fully combined.
  5. Pour the melted chocolate mixture over the flour, & thoroughly mix it in.
  6. In a different bowl stir the mashed banana, almond butter and processed dates into the apple sauce. Fold this mixture into the brownie batter.
  7. Fold in the second 3/4 cup vegan chocolate chips through the brownie batter.
  8. Spoon the brownie batter into the greased baking pan, and spread evenly.
  9. Bake for about 35-40 minutes in the oven, turning them round half way through. The brownies are ready when a skewer dipped into the centre of the brownie mix comes out clean.
  10. Let them cool at room temperature for a while then enjoy! :)

Monday, May 21, 2012

Banana-berry Frozen Yogurt

Oh-my-wow!
There's every chance you may possibly polish off a full tub of this creamy frozen yogurt one go, I know I've made a solid effort at doing so before now. This dessert truly is utterly yummy. The fact it is super healthy, and even easier to make only makes it more delicious too. In fact, it's so easy to make, the only equipment you need is a freezer! (A blender would help too, but this recipe can get by without one.)


Ingredients
  • 2 ripe bananas  (the softer the better but not brown)
  • 4 pots or 1 big pot berry flavoured vegan yogurt (I used banana/strawberry flavour)
  • 1/2 cup strawberries

Directions
  1. Peel & slice the bananas. Place them in a ziplock baggie, and put them & the small tubs of yogurt in the freezer for 2-3 hours.
  2. Slice the strawberries into small chunks.
  3. Take the banana out of the freezer transfer to a plastic container & mash with a fork (this is where the blender would come in very useful). The banana slices should still be soft enough to mash, but they may need to sit out on the side for a few minutes.
  4. Empty the part-frozen yogurt pots into the container, & mash in with the bananas. (Again, a blender would be useful to do this).
  5. Stir in the strawberry chunks.
  6. Put the lid on the container, and put back in the freezer to harden.
  7. Serve with a couple of whole fresh strawberries. Enjoy the yumminess! :)

Friday, May 18, 2012

Blackberry Chia Jam

Continuing on my quest for healthy & delicious gluten free, vegan yumminess for my favourite meal of the day (breakfast, for those of you are wondering), I found this.... Chia Jam! It is so quick & easy to make, and crazy healthy compared to store bought jams & jellies. It's raw, contains no added sugar (just the natural stuff from the blackberries), plus it has the added nutrient packed extra of the new super seed, chia!


Ingredients
  • 1 cup blackberries
  • 1 tablespoon chia seeds
  • 1 tablespoon water
  • agave nectar or stevia to taste

Directions
  • Mash the blackberries with a fork (if they are frozen, be sure to let them thaw first).
  • Transfer the fruit into a jar, mix in the chia seeds & water.
  • You may not need any but you could add a drizzle of agave nectar or a few drops liquid stevia, it just depends how sweet you want the jam.
  • Refrigerate for about an hour.
  • Toast a slice of your favourite gluten free bread, spread with your fresh homemade chia jam & serve. Delicious and oh so healthy!

If toast isn't your thing, you could have it on oatmeal, pancakes, vegan yogurt/ice cream,  or even on it's own as a snack. This also tastes amazing on one of my favourite brown bag/ picnic lunches... almond butter, grilled banana & jelly sandwich. Or as an extra treat, serve it warm & toasted, think grilled cheese meets pb & j, but a way way healthier and good for you version!


Thursday, May 17, 2012

Chocolate Chocolate Chip Coconut Bites

My 'not-so-naughty' Chocolate Chocolate Chip Coconut Bites... indulging my sweet tooth healthily & beautifully.


Ingredients
  • 1/2 cup raw cashews
  • 15 medjool dates
  • 2 tablespoons unsweetened raw cocoa powder
  • 1/4 cup vegan chocolate chips
  • 1/4 cup almonds
  • 1/4 cup unsweetened coconut flakes

Directions
  1. Process the dates in a food processor until they become a sticky dough like consistency.
  2. Add the nuts & cocoa powder, and pulse in the food process until evenly mixed. Don't over process, you want them still a bit crunchy. They aren't as fun to eat if the nuts are processed too finely!
  3. Transfer the mix to a bowl, add the chocolate chips & coconut and mix until combined fully.
  4. Now it's time for the fun bit, slightly messy, but very fun all the same. Break off chunks of the dough and roll into bite-size balls, placing them onto a baking sheet.
  5. Refridgerate until set, if you can resist eating them straight away.
Utterly yummy, and oh so good for you. Your skin will glow, your step will be springy, & your smile will be beaming! :)

If you like these little gems... you will love my Peanut Butter Cashew Cookie Bites!

Wednesday, May 16, 2012

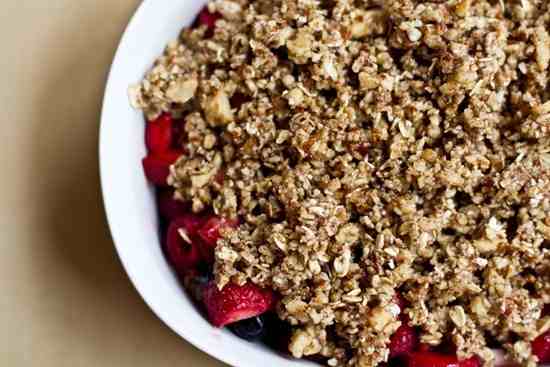
Buckwheat Breakfast Crumble

Breakfast is most definitely my favourite meal of the day! It's also probably the meal that has got most predictable for me since going gluten free. I seem to have fallen into a pattern of having pretty much the same thing most mornings. My go-to options have become gluten-free toast with almond or cashew butter, gluten-free oatmeal with blueberries or a fresh juice (preferably of the green variety). Not that there is anything wrong with any of these options, infact they all super yummy & chock- full of goodness.... I just fancied a bit of a change!

Cue, my Buckwheat breakfast crumble.


I'd not tried raw buckwheat groats before, but I'd heard very good things about them. They are full of fiber, minerals & protein don't you know?! I also wanted to try something a bit diffrent & innovative not just using the regular gluten- free subsitutes. It took me a couple of attempts to get the groats to the right consistency the first time I made it, but once I had perfected them, this quickly became my new favourite breakfast/brunch dish! So, here it is....

Ingredients
(this serves 1, but you could just as easily double or triple it & serve it 'family-style' in a bigger dish)
  • 1/2 banana
  • 2 tablespoons raspberries
  • 3 tablespoons blueberries
  • 4 or 5 chopped strawberries
  • 2 tablespoons gluten-free oats
  • 1 tablespoon raw buckwheat groats
  • 1 tablespoon almonds
  • 1 tablespoon raw organic honey
  • 1 tablespoon raw almond butter

Directions
  1. Rinse the raw buckwheat groats, then soak them in water over night.
  2. Rinse them again, let them dry, and put them in a food processor.
  3. Add the gluten-free oats, almonds, & honey to the food processor, pulse it until just combined, (you don't want the mixture processed too fine).
  4. Slice the banana, and top with the berries in a bowl.
  5. Spoon the almond butter ontop, (you can stir it into the fruit if you like too).
  6. Sprinkle on the buckwheat/ oat mixture and serve.

I'm not on a strictly 'raw food' diet, however I do like experimenting with raw recipes every now and and then. This was one of those experiementations. But equally, it could be baked in the oven and served warm. I just make it like this for it's convinience because I'm always rushing around in the mornings to yoga or work, and don't always have time to bake something. It would also be so delicious served as a healthy dessert with my Coconut ice cream melting over it.

Let me know what you think in the comments below xo

Saturday, May 12, 2012

No-bake Chocolate Chip Cookie Dough

Who doesn't love milk & cookies? And (if I may say so myself) my gluten free, vegan nuggets of loveliness are delicious ones! Both chewy and crunchy, these taste even better dipped in a glass of almond milk, and the fact they are super healthy only make you love them more.

These are already no-bake but if you are following a 'raw' diet, they can be easily adapted. I made them for one of my friends, substituting the vegan chocolate chips for raisins. This version of my cookies works really well for breakfast when your in a bit of a rush too. You could also add a couple of tablespoons cocoa powder if you're wanting a much needed chocolate fix without the choc chips!


Ingredients
  • 1 cup gluten free oats
  • 1/2 cup medjool dates
  • 1/4 cup almonds roughly chopped (optional)
  • 1 teaspoon ground cinnamon
  • 1 tablespoon honey
  • 1/2 cup vegan chocolate chips (more or less depending on how chocolatey you like it)
  • Glass of almond milk to serve

Directions
  1. Food proccess or blend the medjool dates, add the almonds & repeat until mixed evenly through.
  2. Add the gluten free oats honey, and cinnamon to the mixture and pulse until just combined.
  3. Pour the cookie dough mix into a bowl, add the chocolate chips and combine (with a spoon if you don't like to get messy).
  4. Shape the dough into bite-size balls or alternatively you can flatten them into patties, placing them on a lined baking sheet.
  5. Refridgerate for about an hour, then.... enjoy!

Wednesday, May 9, 2012

Chocolate Chia Pudding

Move over every other seed on the shelves at the market, chia are here and they mean business!
These wonderful little seeds are still fairly new to me, but with them being packed with fibre, omega-3s, protein, & anti-oxidants, how can a vegan, foodie, gluten-free girl resist?!


Ingredients
(serves 4)
  • 2 cups almond milk
  • 2/3 cup chia seeds
  • 1/2 teaspoon pure vanilla extract (be sure to check it's gluten free)
  • 2 tablespoons cocoa or carob powder (more or less depending on how chocolatey you like it)
  • agave nectar or honey to sweeten (to taste)
  • Rasberries to garnish (mint leaves or coconut shavings would look/taste cool too)

Directions
  1. Combine the almond milk, chia seeds, & vanilla in a bowl, or shake in a glass jar (making sure the lid is on tight).
  2. Refridgerate for 4-8hrs (overnight is best).
  3. Stir in the cocoa or carob powder, refridgerate for 1-2h).
  4. Stir, spoon into bowls, drizzle with agave nectar or honey if you fancy, & decorate.
  5. EAT and delight in the yumminess.
Little tip- feeling a chill? warm it through! It's delicious hot too.

Sunday, May 6, 2012

Coconut Ice-Cream

If like me you have a huge sweet tooth (& a bit of a thing for desserts) this ice-cream recipe is for you. It is so simple to make. It's also a way for you to indulge healthily, so you don't need to feel guilty either! I use agave nectar too, as I try to avoid sugar. One downside to this recipe is that you do need an ice-cream maker, but you can pick them up really inexpensively now. Plus, you will love this recipe so much, you will definitely want to make it again and again. It's perfect for a treat snuggled up on the sofa watching a film. It's a bowl of love and yumminess!


Ingredients
  • 1 can coconut milk (it's best to avoid lite varieties as this makes the consistency too solid)
  • 1/2 cup dessicated coconut
  • 1/4 cup agave nectar
  • 'goodness' sprinkles of your choice, examples i've used- vegan chocolate chips, fresh bluberries, or cacao nibs

Directions
  1. Soak the coconut in the coconut milk for a few minutes in a bowl.
  2. Add the agave nectar to it.
  3. Take the freezer bowl out of the freezer & assemble and turn on the ice cream maker.
  4. Pour in the coconut milk mixture.
  5. Now you just have to sit back and let the ice cream maker do it's thing! It's that simple!!!
You can either eat it as soon as it's ready, when it resembles a softer 'frozen yoghurt' style texture, or you can transfer it to a different container and let it harden in the freezer for a while. Make sure you let it thaw for a few minutes before you eat it though.

Then all you need to do is sprinkle on your 'goodies' and serve! And there you have it yummy (&healthy) homemade gluten-free vegan ice cream, and cheaper than a tub from the market too.

I've also made this recipe with fresh mango. Which was a super delicious and refreshing alternative. If you want to give it a try as well, all you need to do is take one mango, puree half of it, & add it to the ice cream maker straight after the coconut mix. Then while it's freezing, cube the other half of the mango and add it in about 2 minutes before it's ready, and it's done. Simple!