Monday, August 27, 2012

Banana Cream Pie

Craving pie? Well look no further! This Banana Cream yumminess is for you. It's actually good for you as well, so you can indulge with non of the naughty-ness. It's so healthy, you could even have it for breakfast! Raw, and packed full of fruit & nuts... your skin will glow, your step will be springy, & your smile will be beaming! :)


Ingredients:-
For the pie crust:
  • 1 1/2cups medjool dates
  • 1 cup almonds (walnuts or pecans work too)
  • 1/2 teaspoon maple syrup
  • 1/2 teaspoon freshly scraped vanilla pod
For the cream filling:
  • 1 1/2 cups cashews (soaked in water for 4 hours)
  • 1/4 cup water
  • 2 teaspoons vanilla
  • 2 small ripe bananas
  • 2 tablespoons shredded unsweetened coconut
  • 3 tablespoons maple syrup
For the topping:
  • 2 bananas
Directions:
  1. Place the dates and almonds in a food processor, and pulse until fine.
  2. Add the vanilla and maple syrup and pulse again until mixed in.
  3. Press the almond mix into a pie pan, forming  a crust. Place into the refrigerator while you make the filling.
  4. Drain the cashews, place them in a food processor with the water, and blend together until smooth, scraping down the sides as needed (it should take about 3 mins).
  5. Add the vanilla, coconut and maple syrup, blend until combined.
  6. Slice the banana, add that to the food processor and blend again until fully combined, it should be creamy and very smooth.
  7. Spoon the filling into the pie crust, and spread evenly. Place in the refrigerator or freezer to set.
  8. Slice the bananas for the topping just before you're ready to serve it, (otherwise they will start to go brown) and place them evenly over the set cream filling. It's also better to portion the pie while it's still a bit chilled, as it keeps it's shape a lot better.
  9. Serve and Enjoy!  :)
Wanting to make it even more decadent and luxurious? Why not add 2 tablespoons of cocoa powder to the cream filling or sprinkle with coconut shavings to serve?! Utterly yummy and oh so good for you too.

Sunday, August 26, 2012

The Great Gluten Free Vegan Sandwich Dilemma

Those of you that have visited my blog before will know I've been vegan for a while, (vegetarian for even longer), but after my diagnosis, and the doctor making me go gluten free things started to get complicated, particularly in the sandwich department!


Problem 1.... The bread!
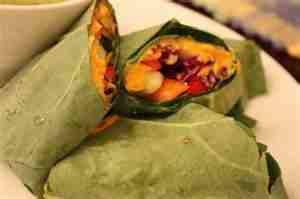
Always read the nutritional info and check the ingredients when you buy bread at the market or grocery store, because just because the packet is advertised as vegan or gluten free doesn't necessarily mean its both (quite a few gluten free breads have egg in). But there are still plenty to choose from, corn tortillas and buckwheat or millet bread rocks! Or, why not forget the bread and make a wrap using collard greens or lettuce instead?! (it's lower carb too).


Problem 2.... The filling!
When I was first diagnosed, I found it so hard to find yummy fillings for sandwiches that were both vegan and gluten free, especially as most vegan meat substitutes are made with wheat gluten. So, I have to admit, Peanut butter and Jelly quickly became my go to option. But, however yummy, my trusty pb and j quickly got boring. So here are a few other sandwich ideas I've tried out...
  • Burger patty spread with hummus and salad (tastes good warm and cold). Amy's Kitchen do a great gluten free vegan 'Bistro' burger, their 'Sonoma' version is also v/g-f .
  • Roasted Mediterranean vegetables, (eggplant, zucchini, peppers, onion, mini tomatoes).
  • Soy cream cheese with mango or grape.
  • Mashed roasted butternut squash, garlic, sauteed red onion and black pepper.
  • For a variation on the classic PB and J, I love almond-nut butter, grilled banana, and my blackberry chia jelly.
  • Bean Chili with grated vegan cheese.
Or, of course, there is the best kind of sandwich.... THE ICE CREAM COOKIE SANDWICH!


Thursday, August 23, 2012

Sweet Apple Kugel & '2 Broke Girls'

A good giggle is super good for you and I love the TV show '2 Broke Girls', (thank you CBS, you rock!) and even though I doubt Max and Caroline's cupcakes are vegan and gluten free... I still think they look delicious! (I just wouldn't be able to sample them).
 
 
But it wasn't their cupcakes and frosting that caught my attention one Monday night. It was the Kugel they were fed! It was the episode entitled...'And the Kosher Cupcakes', and Max was going nuts for the stuff! I have to admit I had never heard of it before this episode, well I'd heard of it, I just didn't know 100% what it was, and I have to say, it had me intrigued!
 
 
The Kugel didn't sound very vegan or gluten free, so, I got to work! After a few tries, some culinary magic happened. Cue my Sweet Apple Kugel.... (P.S. Thank you CBS for the '2 Broke Girls' pics)
 

Ingredients
  • 12oz vegan gluten free pasta (check the label for egg!) I used noodles but any pasta would work. Why not try kugel lasagna?
  • 1/2 cup agave nectar
  • 15oz silken tofu
  • 1 tablespoon unsweetened vanilla soy milk
  • 2 cups raisins
  • 4 medium apples (my favourites are pink ladies)
  • 1/4 cup applesauce
  • 2 teaspoons gluten free vanilla extract
  • 1 teaspoon cinnamon (and extra to dust if you fancy)
  • 3 tablespoons vegan dark chocolate chips (optional)

Directions
  1. Pre heat the oven to 400 degrees.
  2. Cook the pasta according to packet instructions and drain.
  3. While the pasta is cooking peel and cut the apples into small cubes or slices.
  4. In a food processor, blend together the silken tofu, soy milk, applesauce, vanilla extract, and cinnamon.
  5. Toss the pasta with the apple and raisins until evenly distributed. Place half of the noodle mix into a casserole dish or tray.
  6. If your using choc chips, sprinkle them over the noodles, and then cover with the other half of the pasta mix. I sandwich the chocolate chips in the middle, because I think they make an oh-so-satisfying gooey melty surprise, plus it stops them burning if some end up near the top. But,  you could always toss them with the pasta, raisins, and apple if you want them distributed through  the dessert.
  7. Pour the tofu batter evenly over the noodles making sure they are fully coated, and dust with extra cinnamon if you fancy.
  8. Bake for 35-45 mins until golden and (I can't think of a better way to describe this, so I apologise in advance) 'not sloppy'.
  9. Let cool slightly, and serve warm! YUM!
As I can't sample the regular Kugel to taste the difference, I took some to work with me for my Jewish colleague to taste test, and he said, "although it's not quite as good as [his] Bubby's [Grams], it is a close second". He said it didn't taste vegan or gluten free either. So, for a first attempt, I'd definitely call my Sweet Apple Kugel a success! It was so good, I snook some leftovers for breakfast the day after. I know what your thinking, noodles and choc for breakfast?!?! But please don't judge.. I was in a rush. And, there is some fruit in there too! :) xo

Wednesday, August 22, 2012

Chocolate Chip Pretzel Bit Oatmeal Peanut Butter Cookies

I know what your thinking... these little yummies can't possibly be vegan and gluten free, they sound too delicious!? Because even I think that, and I've baked them, (and sampled them). But they are... they really really are! (They are just as delicious as they sound too).


Ingredients
  • 2 1/2 cups gluten free oats
  • 1/4 cup gluten free flour
  • 3/4 cup (smooth) peanut butter
  • 2 tablespoons peanuts
  • 1 ripe banana
  • 1 teaspoon gluten free vanilla extract
  • 2 tablespoons maple syrup
  • 2 tablspoons unsweetened vanilla soy milk
  • 1/2 cup vegan dark chocolate chips
  • 1/4 cup vegan gluten free mini pretzels

Directions
  1. Pre heat the oven to 350 degrees.
  2. Pulse the peanuts in a food processor until they are small pieces, or put them im a zip lock and bash, and set aside.
  3. Place the pretzels in a ziplock, bash into small pieces, and set aside.
  4. Puree or mash the banana and place in a large bowl.
  5. Add the peanut butter, soy milk, vanilla, and maple syrup to the banana and mix well.
  6. Add the oats, and flour and stir through, until fully combined.
  7. Add the choc chips, pretzel bits and peanuts and stir through the cookie mix.
  8. Drop spoonfuls of dough onto an ungreased cookie sheet (I used an ice cream scoop), and bake for 12-15 mins or until golden.
  9. These taste best if you let them cool slightly and serve warm, maybe even with ice cream for an extra treat, but they will stay fresh for a few days in a cookie jar!

Hot Chocolate Banana Breakfast Quinoa

Chocolate for breakfast? Oh yes, yes, yes! This is a really yummy alternative to oatmeal in the mornings, it gives you a quick chocolate fix too... and if you're like me I need atleast 3 chocolatey hits a day!


Ingredients
  • 3/4 cup quinoa
  • 1/4 cup gluten free oats
  • 1 1/2 cups unsweetened vanilla soy/almond milk
  • 1/2 cup water
  • 1 banana
  • 2 tbsps cocoa powder
  • 1 tbsp raisins

Directions
  1. Mash or puree the banana and set aside.
  2. Put the quinoa, milk, and water in a saucepan, bring to boil, then turn down to a low heat and simmer for 15 mins.
  3. Add the oats, and simmer for a further 10mins.
  4. Stir in the raisins, cocoa powder and pureed banana until fully combined.
  5. Spoon into a bowl, and serve warm. Yummy in your tummy!
This also tastes amazing with a tablespoon of almond or peanut butter stirred through... packs some extra protein in there aswell!  Perfect for a pre- or post- workout breakfast.

Thursday, August 2, 2012

Fudgsicles

One of the best things about summer? Why, popsicles of course! And just because you're vegan and gluten free doesn't mean you can't indulge. Even if you aren't, you will still love these fudgsicles, they are super easy to make, and they are heaps healthier for you too! Bonus!


Ingredients
  • 5 bananas
  • 3 tablespoons cocoa powder
  • 2 tablespoons peanut butter
  • 1 teaspoon gluten free vanilla extract
  • 1 tablespoon unsweetened vanilla soy milk

Directions
  1. Peel and slice the bananas and freeze them in a ziplock bag for about an hour.
  2. Place all the ingredients in a food processor, and blend until they are all combined, and a suitable texture to put in your popsicle mould. It should be soft but not too runny.
  3. Spoon your chocolate banana mixture into the popsicle moulds, and freeze until set (mine took about 3 hours).
  4. Enjoy... YUM! :)


Sunday, July 1, 2012

Ice Cream Sandwich Cookies

Happy 4th July weekend conscious foodies! My roommate's family have invited us to a sort of 'potluck' cookout (complete with fireworks...of course!) to celebrate, and as gluten free, vegan options are often quite limited, I'm making these little bites of yumminess to take with us for dessert. If you're looking for yummy gluten free, vegan recipe ideas for 4th July, these Ice Cream Sandwich Cookies are most definitely for you.


Ingredients
For the cookies:
  • 1/2 cup unsweetened applesauce
  • 1 1/2 teaspoons chia seed meal
  • 1 tablespoon cocoa powder
  • 1 teaspoon gluten free baking powder
  • 1 1/2 cups teff flour (this is actually gluten free, I discovered it a few months ago at the market, I used brown as I thought it gave the cookies a nicer color)
  • 2/3 cup gluten free brown rice syrup
  • 1 teaspoon gluten free vanilla extract
  • 1 cup almond butter (I think the smooth kind works best in this recipe)
For the ice-cream:
  • 3 large bananas (peeled, sliced & frozen)
  • 3 tablespoons soy milk (unsweetened vanilla would taste really good, but normal works)
  • 2 teaspoons gluten free vanilla extract

To make the ice cream filling chocolate flavor, add 2 tablespoons cocoa powder. Or, if you have an ice cream maker, you could make my coconut milk ice-cream.

Directions
  1. Preheat the oven to 350 degrees, and line a really large (or 2 small) cookie sheet with baking parchment paper.
  2. Stir the chia seed meal into the applesauce & set aside.
  3. Sift together the cocoa powder, four, & baking powder.
  4. In a small sauce-pan over a very low heat, gently warm the almond butter, as it softens add the syrup & vanilla extract. Take the pan off the heat & stir through.
  5. Add the almond butter mixture to the dry ingredients and mix together until fully combined.
  6. Roll out your cookie dough to the desired thickness, (I like mine quite thin.. a bit less than 1cm thick. You may have to adjust the cooking time) and cut into rectangles.
  7. Arrange the dough on the cookie sheets, leaving a couple of inches between each one.
  8. Bake in the oven for 7-10mins. Do not overbake, they should still be quite soft.
  9. Let them cool, and harden slightly. If you're not assembling the sandwiches straight away you can freeze them in an air tight container or ziplock baggie, until you're ready.
  10. Take the bananas out of the freezer and place in a blender or vitamix. Pulse a few times adding in the soy milk and vanilla extract as you do.
  11. You can then either, if you like you're ice cream a more 'soft-servey' texture, make the sandwich cookies straight away, or you could re-freeze the ice-cream for a little while to let it firm up, like I did. I did however, sneak one 'soft-serve' style, because they looked too darn delicious!
  12. I then, used a cookie cutter to get the ice cream in the same rectangle shape as the cookies, assembled it between two of them, and then used a spoon, to the neaten up the sides. Repeat with all the cookies.
  13. Serve, and enjoy! YUM-my! :)